The crystalline structure of a snowflake is hexagonal (six-sided.) The radiating design of each snowflake is unique. A study of snowflakes expands upon radial design explorations. Solving the problem of how to construct a 6-sided radial can be an exciting challenge – especially on a snow day. It is both a geometry problem and a design problem.
Snowflakes
When students create snowflakes they develop and practice:
- multiple strategies for creating a hexagon.
- hand orientation, placement, and spatial skills.
- using mathematical variables such as number, grouping, direction, alternation, position, length.
- decorative design.
hexagon
hexagonal
snowflake
radial
center
crystal
crystalline
ray
repeat
Materials
- Large line tool to begin
- Small line tool to add later
- Copy paper or some kind of practice paper
- 12 X 18” blue (or another color) construction paper
- White tempera paint in a squeeze bottle
- Trays or small coated paper plates
- Found objects, one per child (in reserve)
Setup
- Cover tables with newspaper
- Place practice paper at each student’s place
- Place large line tool at each place
- Have trays of paint in reserve until after children have practiced printing with the large line tool.
You Might Ask:
I thought you might like to build upon your radial design explorations by constructing hexagonal snowflake designs. Let us take a few moments to share what we know about snowflakes.(They are hexagons. Each one is different….)
Ask, How could you use the straight line tools to construct a hexagon or 6-sided structure? Pretend that your hand is a straight line tool and demonstrate your strategy. Pick up on student suggestions as you demonstrate a few strategies.
For amazing images of actual snowflakes visit: macro photography of snowflakes by Alexey Kljatov
If you have time, read one of the many wonderful books about snowflakes or show images from the internet. Google “snowflakes” or “books about snowflakes” for a wealth of images and ideas.
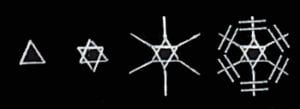
Here are two ways to generate a six-sided structure with a line:

Print a diagonal line.
Cross it.
Cross it again.

Print an equilateral triangle.
Overlap with another equilateral triangle.
Extend the points.
Be sure to take a few minutes to try printing a beginning snowflake structure yourself before working with students
Creating a clear beginning structure is the most difficult part of this exploration. It really helps to demonstrate and have students try out the two strategies shown.
As you demonstrate, turn your paper to emphasize the change in orientation as you print each line. Allow classroom time to share discoveries and to experiment with a variety of solutions.
- Practice positioning and printing without paint.
- Practice at least two strategies for constructing a hexagonal and radiating structure.
- Print on practice paper.
After building the basic structure, an 8 year-old picks up the smaller line to create the sides of his hexagon. Notice how carefully he works to get the correct orientation to print each side. It is not so easy! Check out his final creation in Step 2 – done just a few minutes later.
Refine your ideas as you print on construction paper.
In this video, taken just 10 minutes later, you can see how this child has built upon his earlier experiment, and has expanded the dimensions and complexity of his snowflake. Now he is using a found object to embellish his design. Notice that he also works with more confidence, since he knows what he is doing.
Embellish – As children complete their basic structures, the teacher offers one small found object to each student with a reminder to repeat each mark in each section – six places!

Keep in mind that found objects are not a necessity. Exquisite designs can be created with the large and small line tools. An even smaller line tool could also be added. Sometimes linear creations can be even more complex and exciting to create.

*By practicing before going to construction paper, children have the freedom to try basic structures and to test their ideas. After ten minutes or so of practice time, hand out blue construction paper for final prints.
*Offer only the large line tool to begin. Add the smaller tool when you observe that children have a need for it.
Printing each mark in six different sections is difficult and takes concentration! Turning the paper can sometimes help. And it definitely helps for students to stand up so that they can see their whole design from a top view as they work.
*Ask students to count the number of sides on their constructions. Often octagons are created, since they are easier to construct. Do allow for this possibility! But consider, It is exploring that is important – not so much whether you have a perfect hexagon.

As a “when you are done” activity, print a snowflake on a group mural.
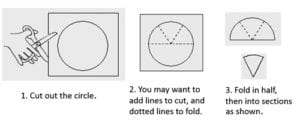
Cut a Snowflake
Cutting a six-sided shape is another way to study and recreate snowflakes. Photocopy paper cut into squares works well.


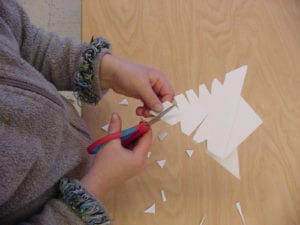
4. Snip small triangles from each edge.
Directions from Michelle Dilts, Kindergarten teacher, Smith College Campus School

Cut snowflakes put through a laminator and displayed as a room divider.

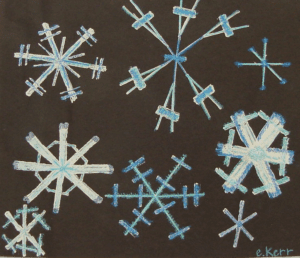
By Elizabeth Kerr – student in the Teaching of Visual Arts class
Once prints have dried, add color with oil pastels.


