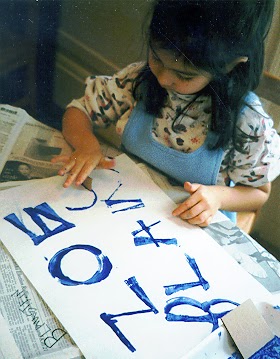
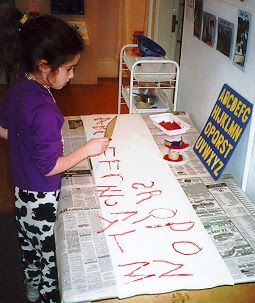
While exploring the process of printing a few children are sure to begin constructing letters. “They’re all lines!” said Isabel (age 4) while her preschool class was thinking about how to print the letter “A”. The letters of the alphabet are made up of vertical, horizontal, diagonal and curved lines. Line printing is a concrete way to see, experience, and demonstrate these complex understandings on paper.
Letters & Names
When printing letters of the alphabet, children develop and practice:
- letter recognition
- letter construction
- understanding differences between letters
- hand orientation
- proper hand pressure and grip
- placement skills
- spatial awareness
- printing curved lines
- thinking ahead
- analytical thinking skills
straight
curved
the alphabet
letters
Materials
- Large straight line tool, one per child, extras in reserve
- Large curved line tool, one per person, extras in reserve
- Small line and small curved tools if desired
- 12” X 18” (30 X 46 cm)or larger
- Tempera paint, one color
- Trays or small coated paper plates
- Post an Alphabet chart so that children can easily see it.
A B C D E F G H I J K L M N O P Q R S T U V W X Y Z
Set-up
- Place papers
- Large straight line tool at each place
- Large curved line tools at each place or available to share
- Trays of paint in reserve
Straight Edge Letters
Begin a letter exploration by focusing on the straight-edge capital letters since only one tool – the large, straight cardboard line tool – is needed. Personalize the experience by choosing a straight-edge letter from a child’s name and asking, “Do you think you could figure out how to print a _______ with this line stamp?”
Allow time for children to practice creating letters with the straight line tool (no paint)
If possible, suggest that children begin with the letters that are easiest to construct – those made from horizontal and vertical lines. Letters with diagonal lines are trickier to construct.
Introduce the Curved Line Tool
The best time to add a curved line tool is when you observe that children have a need for it. When I held up the curved line tool I heard a chorus of children saying, “Now I can make my P… D… S… J…” They knew they needed a curve!
Take time to brainstorm and play with strategies for constructing letters that are particularly difficult to print such as B, D, G, J, Q, R, S.
Cut the inside of masking tape rolls, or cut paper coffee cups in half and trim to make the large curved line tool.
Watch children experiment with the printing process and letter construction for the first time.
Marlena (age 4) and Andrew (age 4) demonstrate practicing and then printing the letter “R” as they use the line stamps to print their first names. “R” is one of the most difficult letters to construct.
The First Letter
In order to print each letter — and especially that first letter — children have to think first about how many lines and times they have to print in order to create that first letter of their name. They also have to use analytical thinking skills to figure out the direction, position and spacing of each printed line. Here a teacher helps children to focus before they go to explore.
Anna Pertzoff, a student teacher, noticed that her kindergarten students were naturally repeating and designing with letters while exploring. She pointed this out the next day, and encouraged them to revisit their idea by making a design from their favorite letters. She suggested that turning the paper around while working might help the design process.
A teacher of 4-5 year olds decided to set up a table in the room where children could continue to construct letters. Notice that she placed each of the 4 line tools into separate trays so that they would be easy for children to locate, use, and replace.
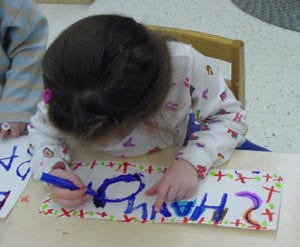
After name prints are dry, invite children to decorate their name prints.
Shannon (age 6)